A step by step guide to linking your Active Directory instance to SwipedOn
🏳️ Available on our Enterprise plan
To set up a sync from your on-premise Active Directory to SwipedOn, first, download the Sync Agent application from the Integrations page on the SwipedOn web dashboard. You should install it directly onto your Active Directory Server. Once you have installed the Sync Agent, follow the below steps.
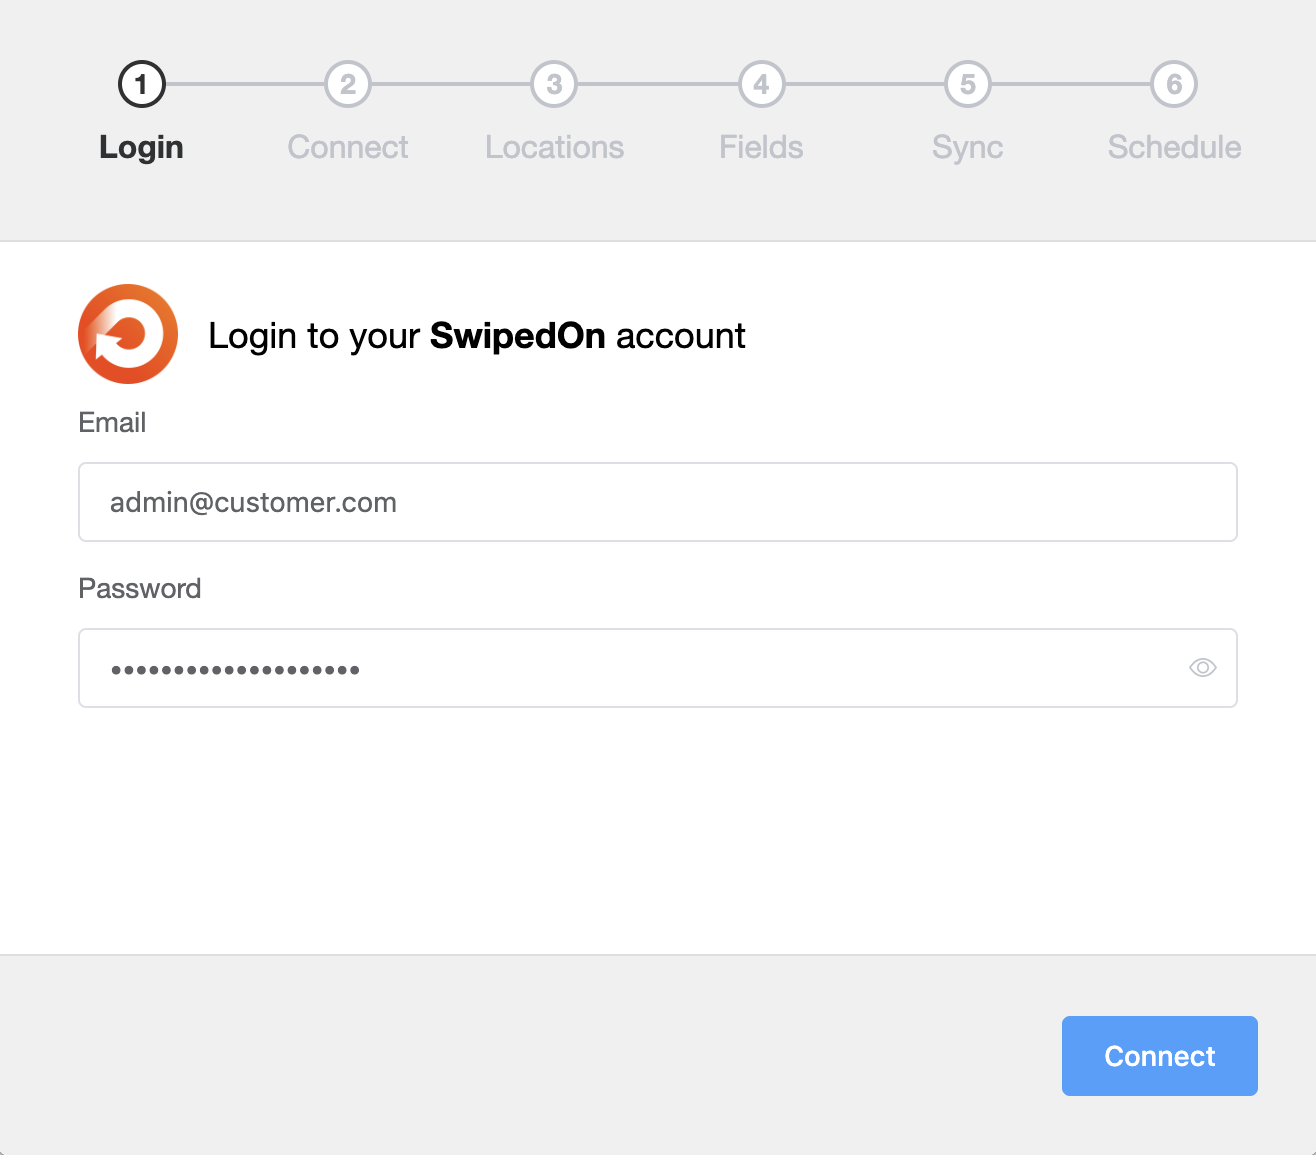
Log in to SwipedOn
Sign in to the Sync Agent with your SwipedOn Company Admin username (email address) and password. You should use the login of a real employee with a Company Admin role.
Your SwipedOn password will be encrypted and securely stored in the Windows Password Vault.
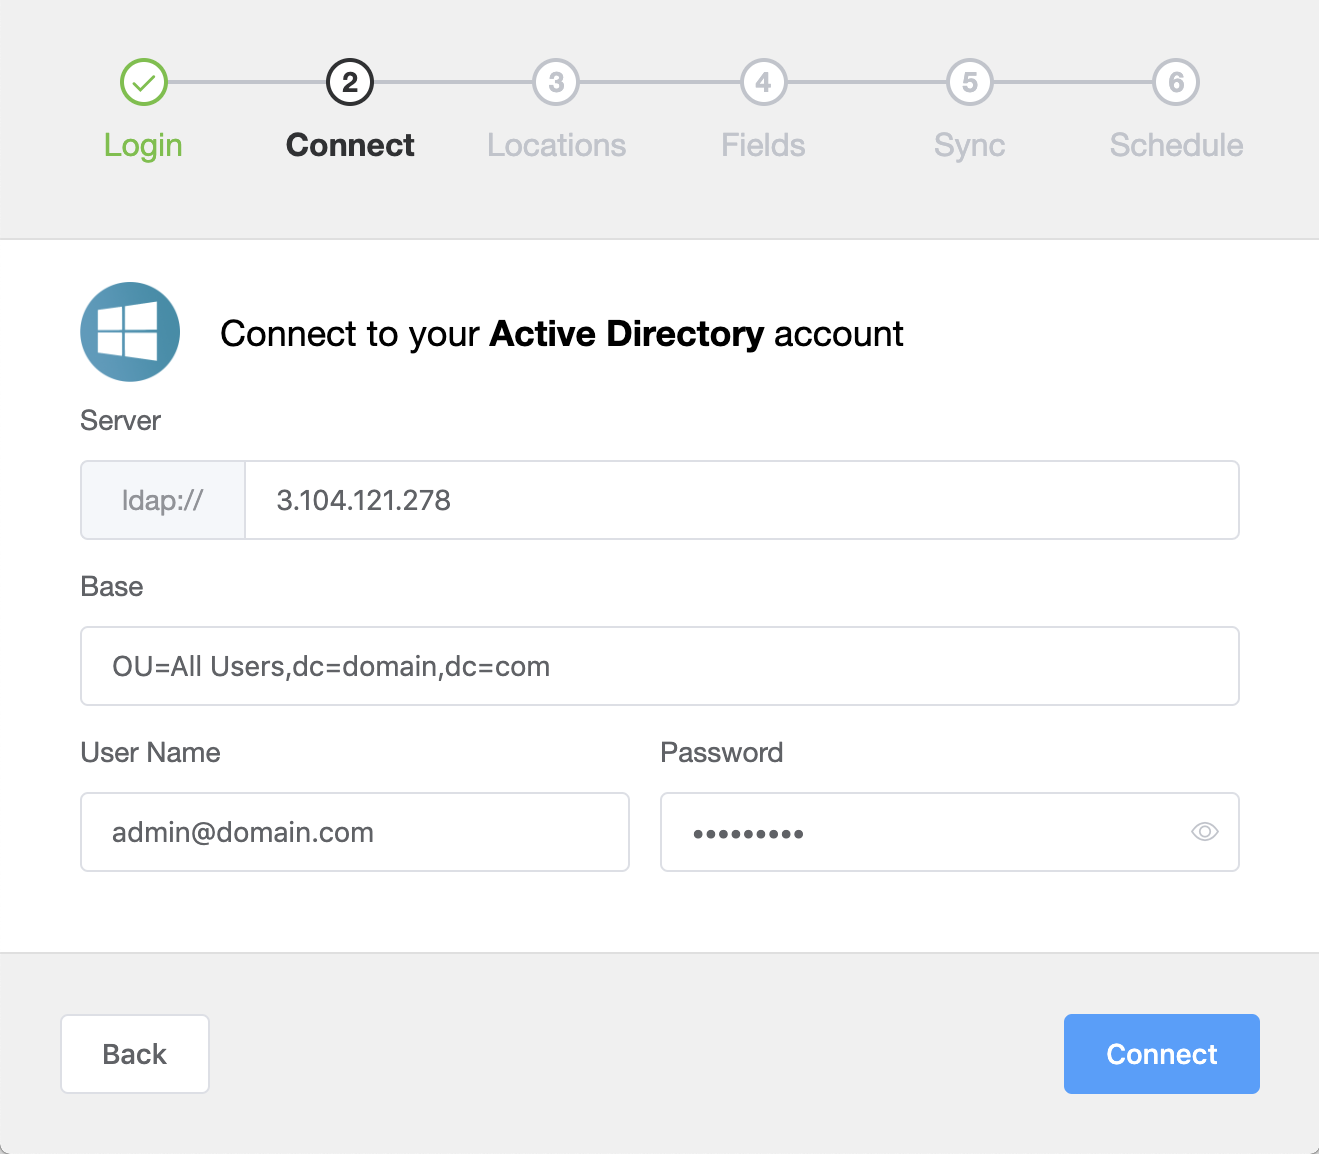
Log in to Active Directory
Next, sign in to your local Active Directory instance.
The server should be the local server URL or IP address for Active Directory.
The base should be the base setup of the Active Directory server.
A normal minimal base setup is 'dc=domain,dc=com', where the first 'dc' is the local domain server and second is the extension of the local domain server (eg: .com, .local, .ext, .net)
The base field can be used for advanced targeting and filtering options within the Active Directory. You can filter to a specific group of users in an Organizational Unit within the Active Directory by including the OU as part of the base. For example, to target only users in an Organizational Unit called 'Auckland Group', complete the base field with: "ou=Auckland Group,dc=domain,dc=com".
The user name should be that of a user who has read access to the Active Directory. It should be in the format username@domain.extension.
The password is the password that matches the above username. Again, your Active Directory password will be encrypted and securely stored in the Windows Password Vault.
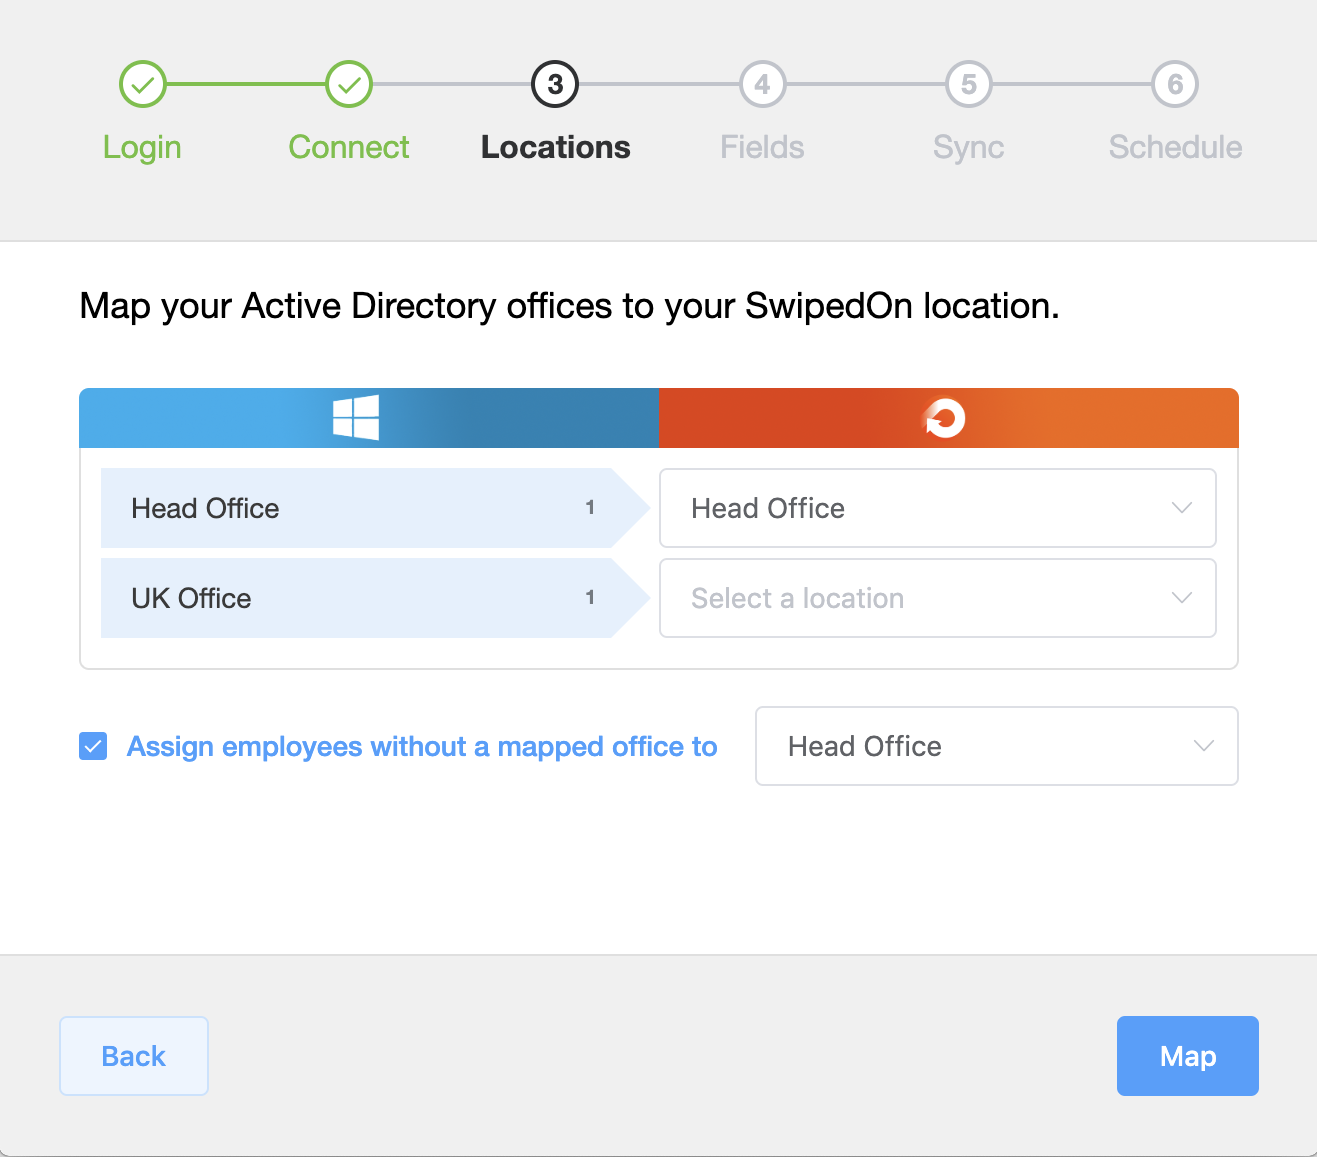
Map Locations
Next, you should map Active Directory offices to SwipedOn locations. The left column contains all offices listed against User in Active Directory, along with the number of employees who are assigned to that office. From the dropdown box on the right, select the SwipedOn location that each Active Directory office should be linked to.
If you have a single SwipedOn location and wish to sync everyone in your Active Directory (as defined in the base in the previous step), you don't need to have offices completed in Active Directory. Check the 'Assign employees without a mapped office to' checkbox, and select your SwipedOn location from the dropdown.
If you have an Enterprise plan with multiple locations in SwipedOn, you must map Active Directory offices, and ensure that each user has their correct Office value in Active Directory.
Should you need to, you can map multiple Active Directory offices to a single SwipedOn location.
Once you have your locations set, click the 'Map' button to continue, then the 'Next' button on the confirmation page.
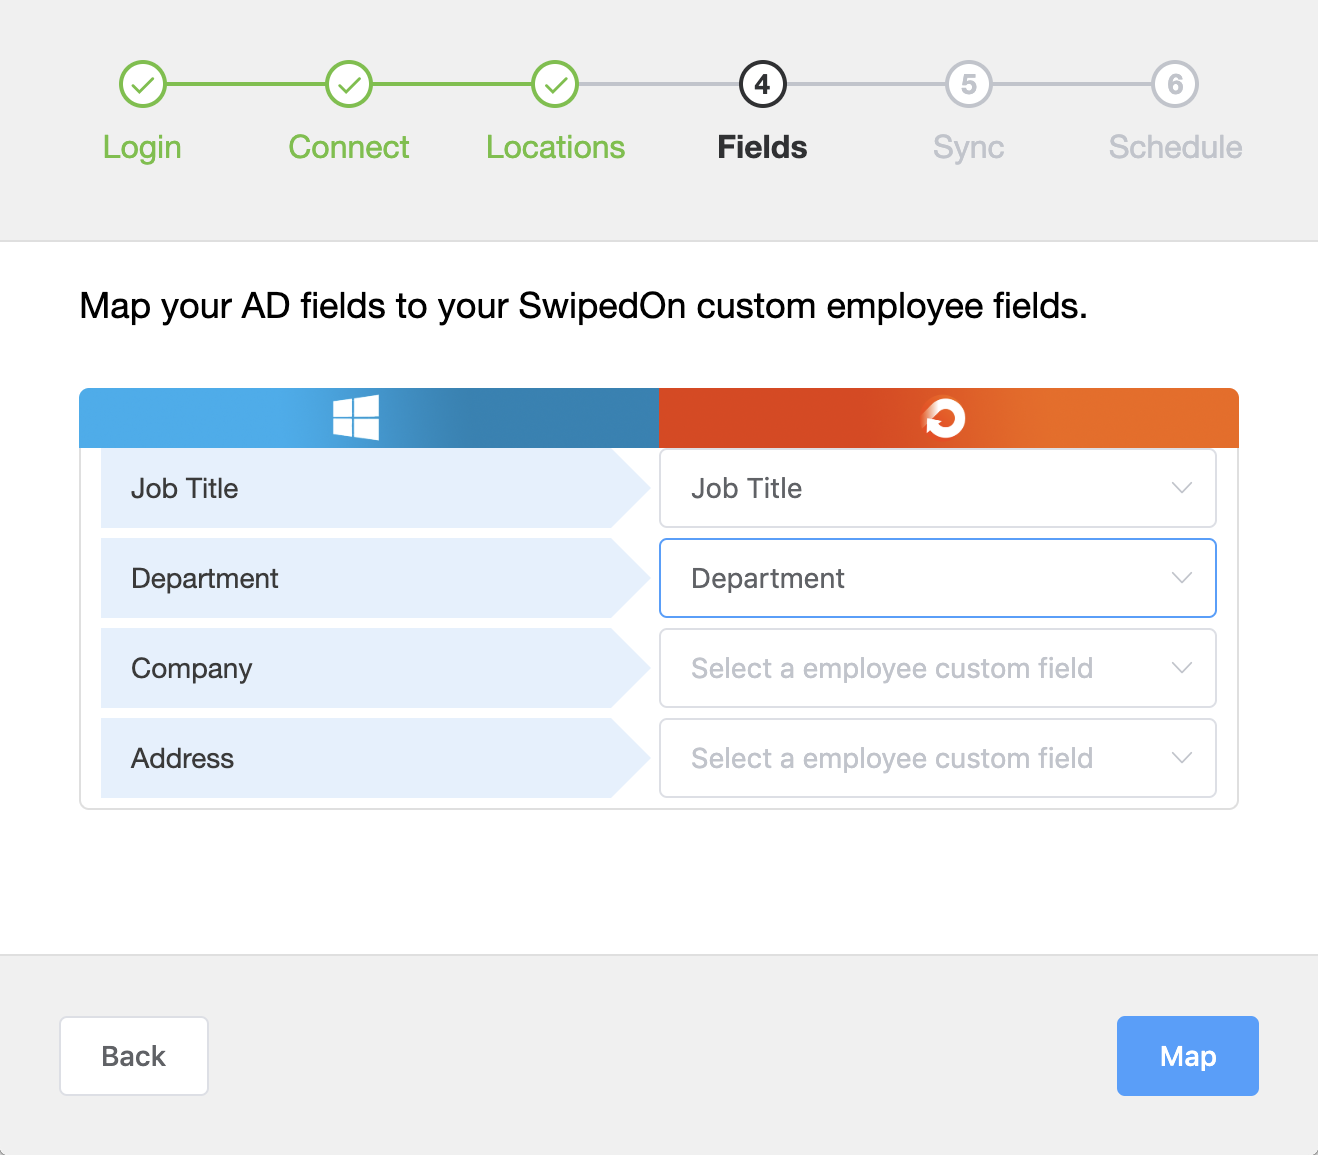
Map Employee Fields
By default, an employee's first name, last name, email address, telephone number and office will be synced with SwipedOn. If you wish to synchronise other data about employees from Active Directory, you can map fields to employee custom fields in SwipedOn. Useful examples could be Job Title or Department. So long as the custom field is set up in SwipedOn, you can select it from the relevant dropdown box to link it to an Active Directory field.
Once you have fields linked, click the Map button to continue, or if you don't wish to map any fields, click Skip & Sync.
Synchronise
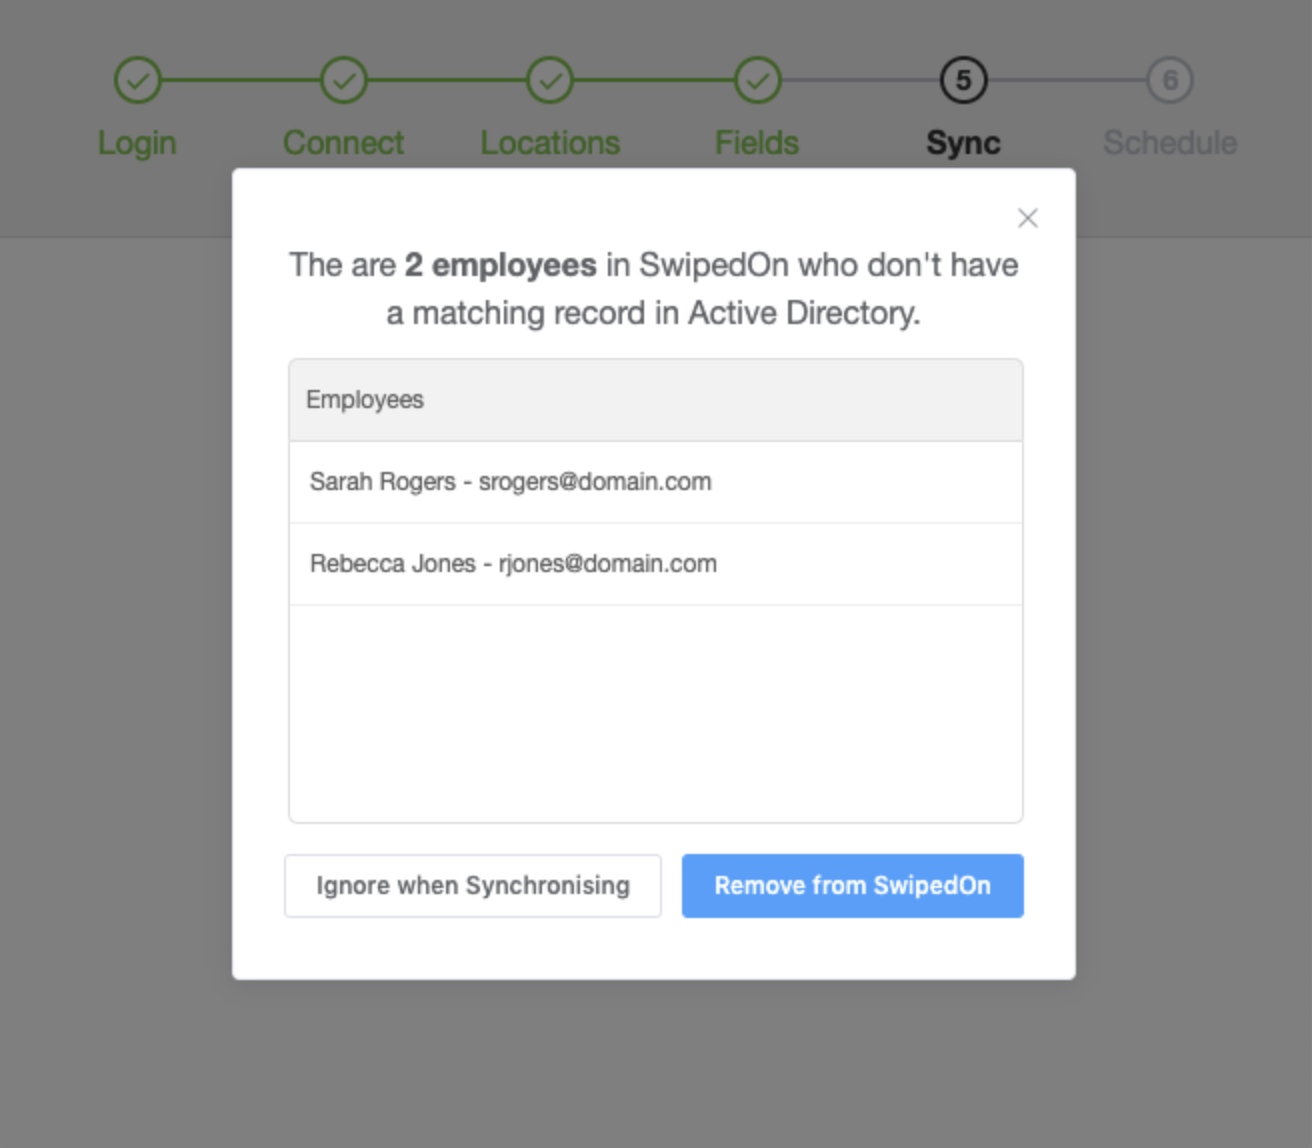
The Sync Agent will now run an initial comparison between Active Directory and the SwipedOn employee list. If there are any employees in SwipedOn who don't match a user in Active Directory (by email address) these will be listed for review. You can choose to remove these employees from SwipedOn, or ignore them. If ignored, they will remain in SwipedOn and not be updated by any future synchronisation from Active Directory. You can change this for individual employees later in SwipedOn if you wish to change them to be synchronised in future.
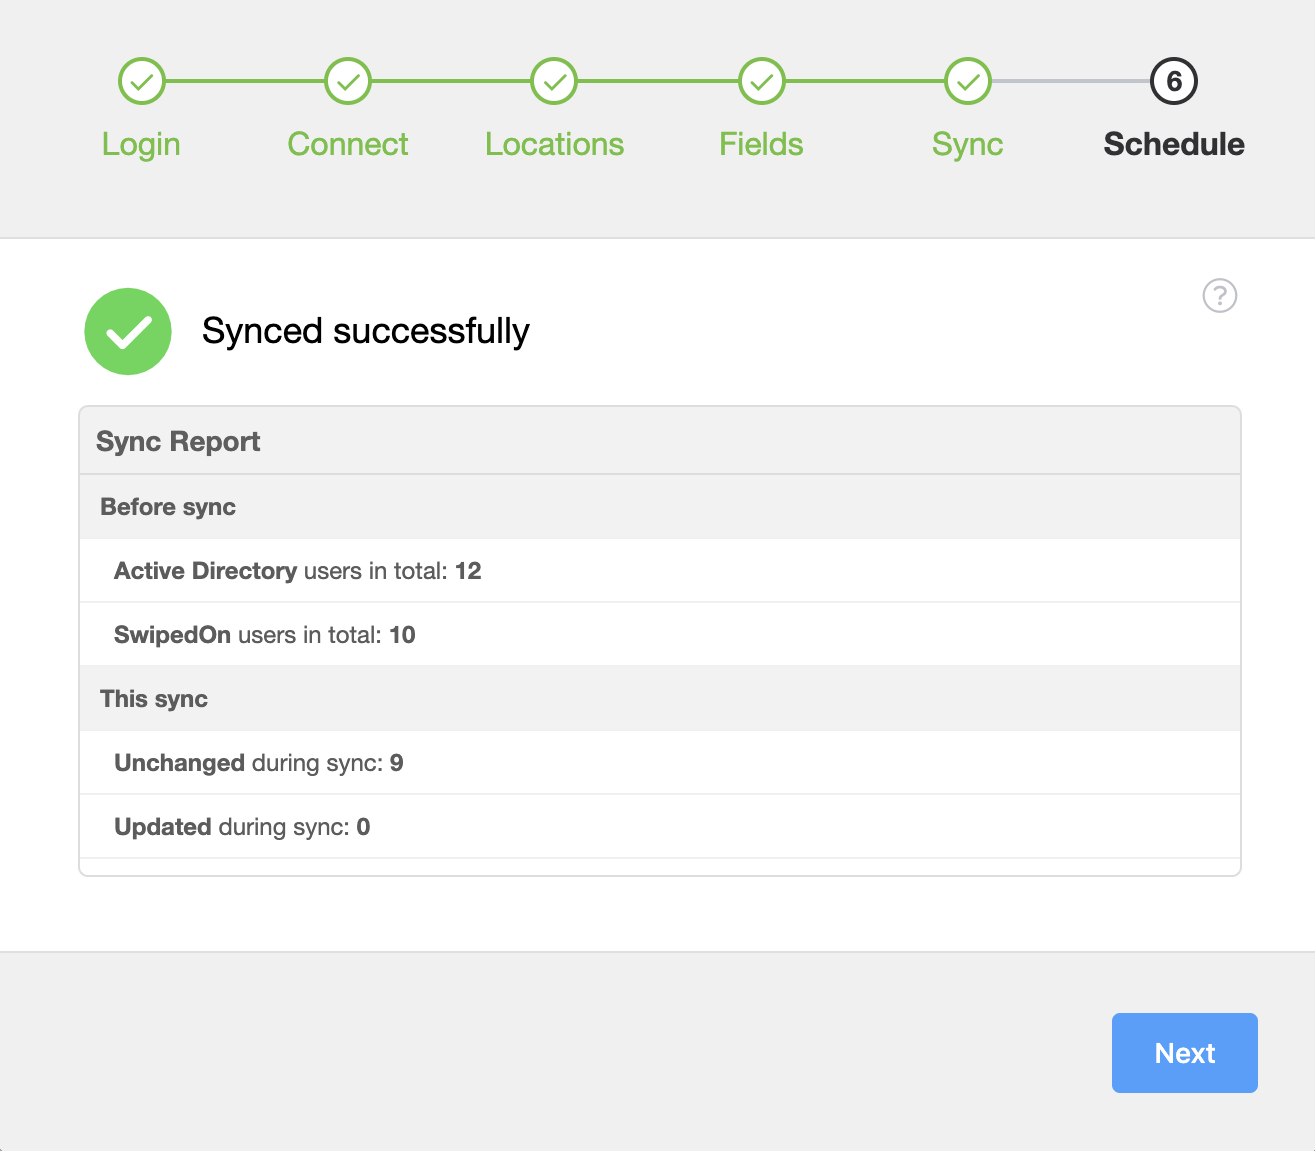
Once you have selected what to do with unmatched employees, the initial sync from Active Directory to SwipedOn will begin. Wait while employee records in SwipedOn are created, updated and removed as appropriate.
When the sync is complete, you can view a report of how many records were changed via the synchronisation process.
Schedule
Once you've completed initial sync, you can choose to set up a regular synchronisation event to take place daily, weekly or monthly. Select your preferred option and the time that the sync should take place, then click the Set Schedule button.
With a schedule set, the Sync Agent will run a regular comparison between SwipedOn and Active Directory. If a change is found in Active Directory that isn't shown in SwipedOn, SwipedOn will be updated. This includes creating a new employee, removing an employee that has been removed from or disabled in Active Directory, or updating any changed details about a matched employee. Changes made in SwipedOn will never overwrite Active Directory - indeed, if a change has been made in SwipedOn but not in Active Directory, the sync will return the SwipedOn record to the way it was before to once again match Active Directory.

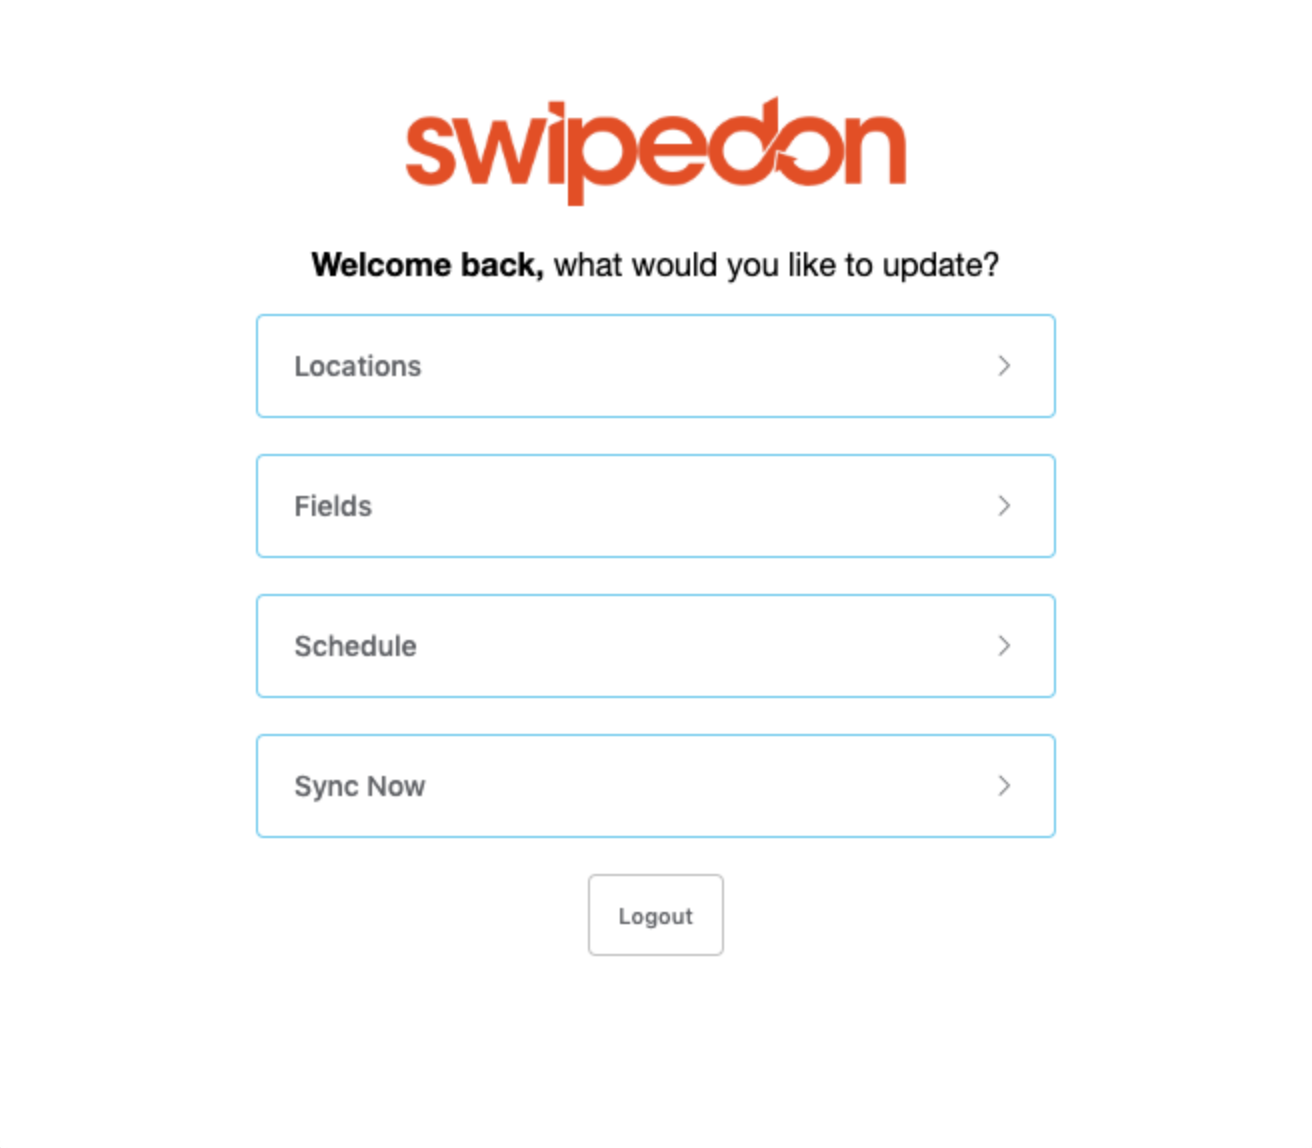
Maintaining an existing sync
If you add new locations or employee fields on SwipedOn, you will need to update your Sync Agent settings to include these in future sync events. Open the sync agent, then select the page you wish to make changes to from the main menu. You can also push through a manual sync at any time by clicking the Sync Now button from the main menu.